Sketching with a dash of salt
I’ve led two arty holiday this year, both involving a certain amount of sea travel. The first was a shore based tour on the lovely Isles of Scilly in June, travelling there on the stately ferry Scillonian. She rolls in a big sea, and the sailing time was brought forward to get ahead of a gale. I took a seasick pill, found a bench at the bottom of the ship and dozed for the short trip from Penzance. The weather improved for my week with Art Safari guests as we sketched our way around the islands, returning each day to our hostel on St Mary’s. (see www.artsafari.co.uk for next year’s plans)
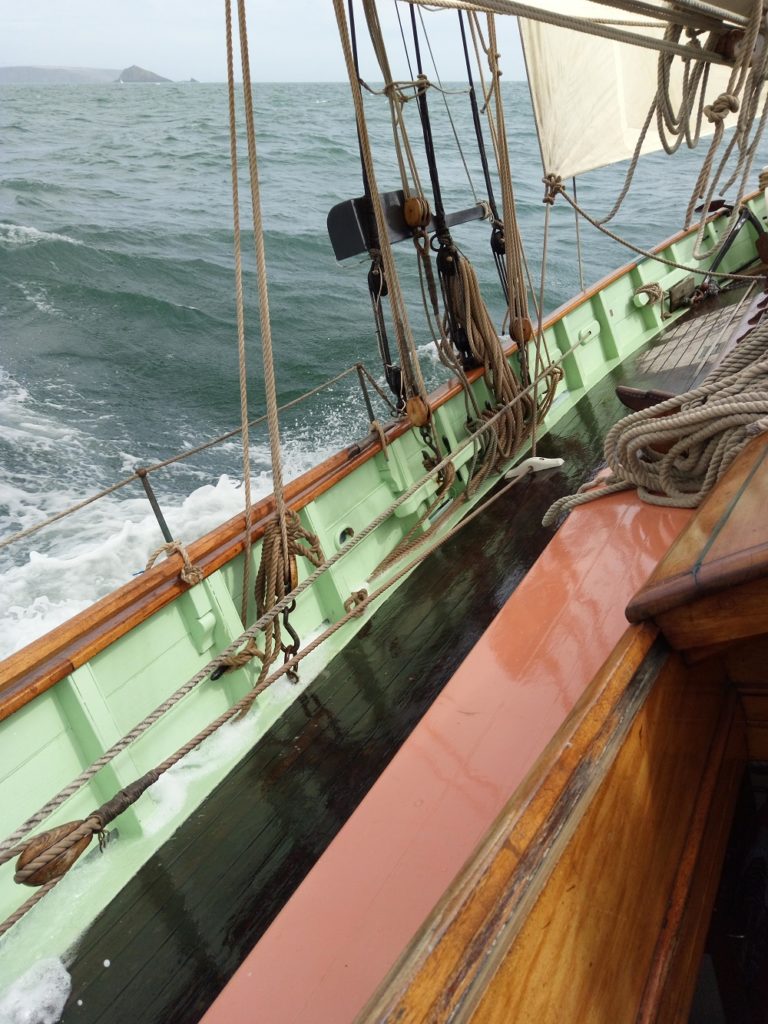
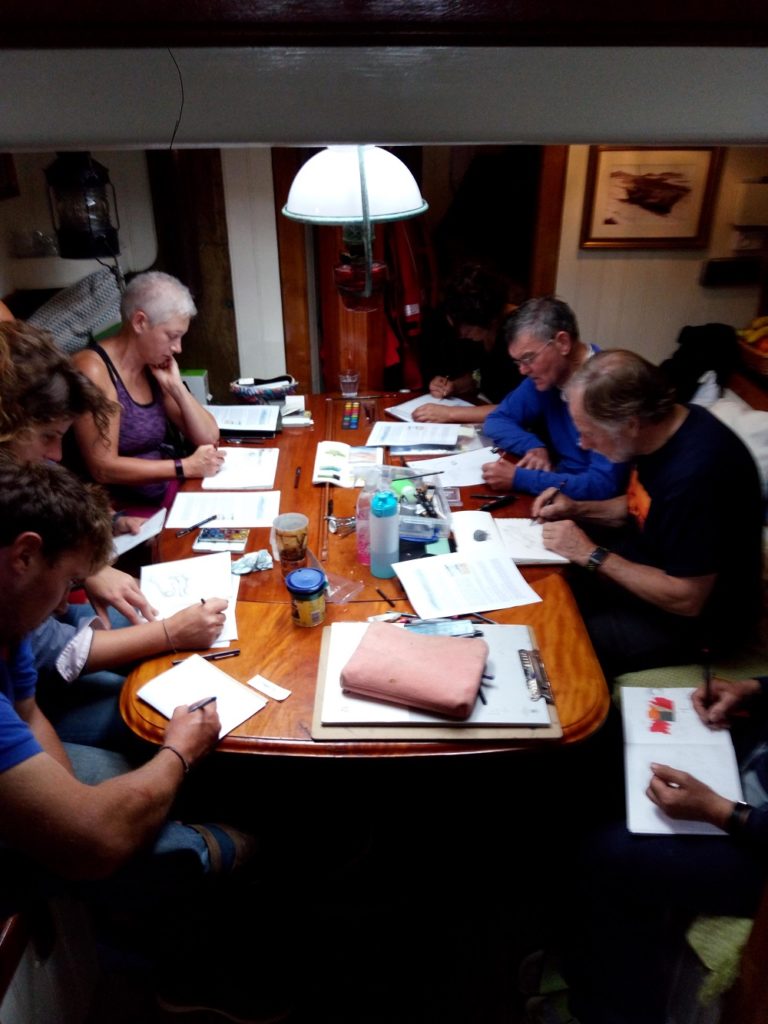
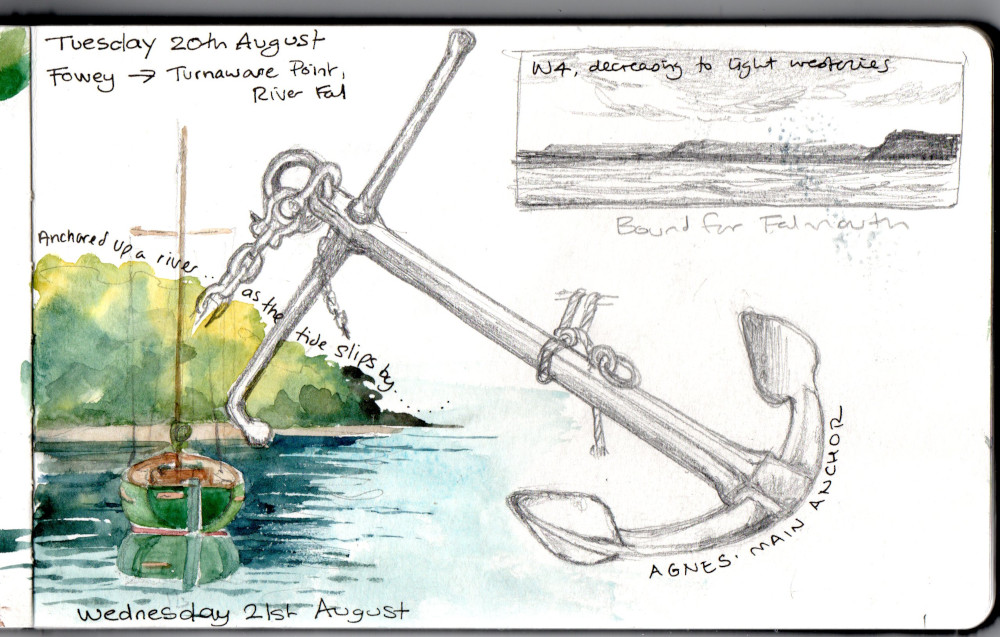
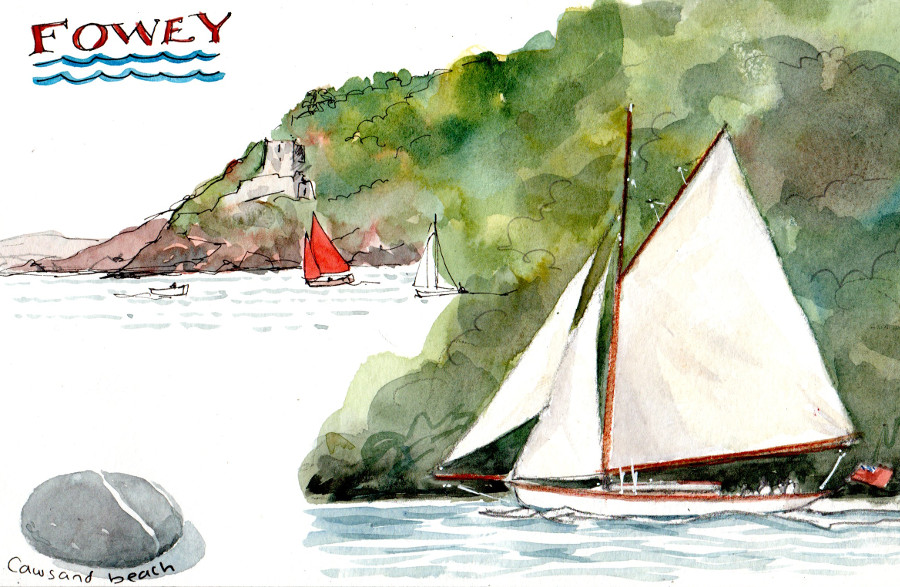
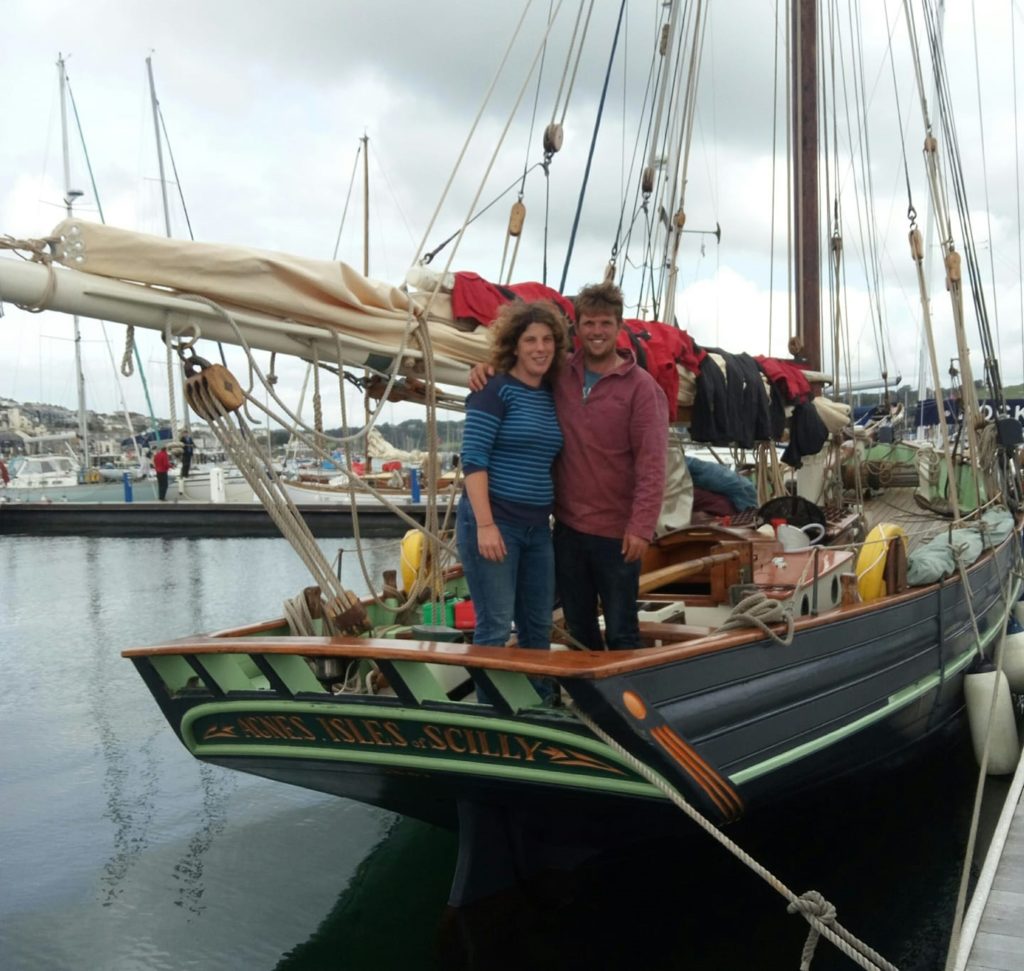
My second trip of the summer was more challenging – a sketching and sailing charter on board pilot cutter Agnes, built and owned by Luke Powell of Working Sail in Cornwall. We planned to go to the Scillies, but the forecast had other ideas, with strong westerly winds in store all week. Our skipper wisely persuaded everyone that Plymouth was a good place to go, so off we went on a fast downwind sail and made the best of the weather in Plymouth Sound, Cawsand and Fowey. Turner may (or may not) have lashed himself to the ship’s mast to paint big seas, but we preferred to squeeze round the cabin table for drawing tuition and sketching sessions, fortified by ample food and cakes baked daily by the mate (the only person I know who can bake a chocolate guinness cake, fully iced, whilst beating to windward in a force 5-6 and very lumpy sea).
In spite of the weather, which wasn’t all bad – there was a decent amount of sunshine along with the strong winds – it was a successful week, and hopefully the sketching will carry on for long after the holiday has ended. For those of you who couldn’t be there and want to draw boats but don’t know where to start, here’s a summary of my top tips for maritime sketching. I’m sure I’ve posted this before, but I can’t remember when (and who wants to rummage back in the archives anyway!)
TIP ONE – Create a ‘Carnet du Voyage’
Drawing is not a competitive sport and you don’t have to produce ‘art’ to put in a frame. Use your sketches to build up an illustrated log book of your cruising, a kind of Carnet du Voyage, or travel diary. This lets you off the hook completely; it’s a personal record and can be as quirky as you like. Mix words and pictures on the page, stick bits of charts in or souvenirs, draw on top of other drawings, do whatever you need to do to get your experiences down on paper. Even a five minute sketch is worth doing. Fill the page with fragments and impressions.

Carry a small sketchbook and pencil/pen everywhere. Use it! You don’t need to show anyone if you’re embarrassed by your efforts, but if you persevere the pictures at the end of the sketch book will be better than those at the beginning.
TIP TWO – Start to notice things
We don’t look at anything properly unless we are trying to draw it – our brain edits out most of the information that comes in through the eyes. Even when you don’t have a sketch book in your hand, ask questions of your eyes as if you do. What shape is the bow? What’s the shape of the wave curling past the hull? Is the sea darker or lighter than the sky? Are there reflections?
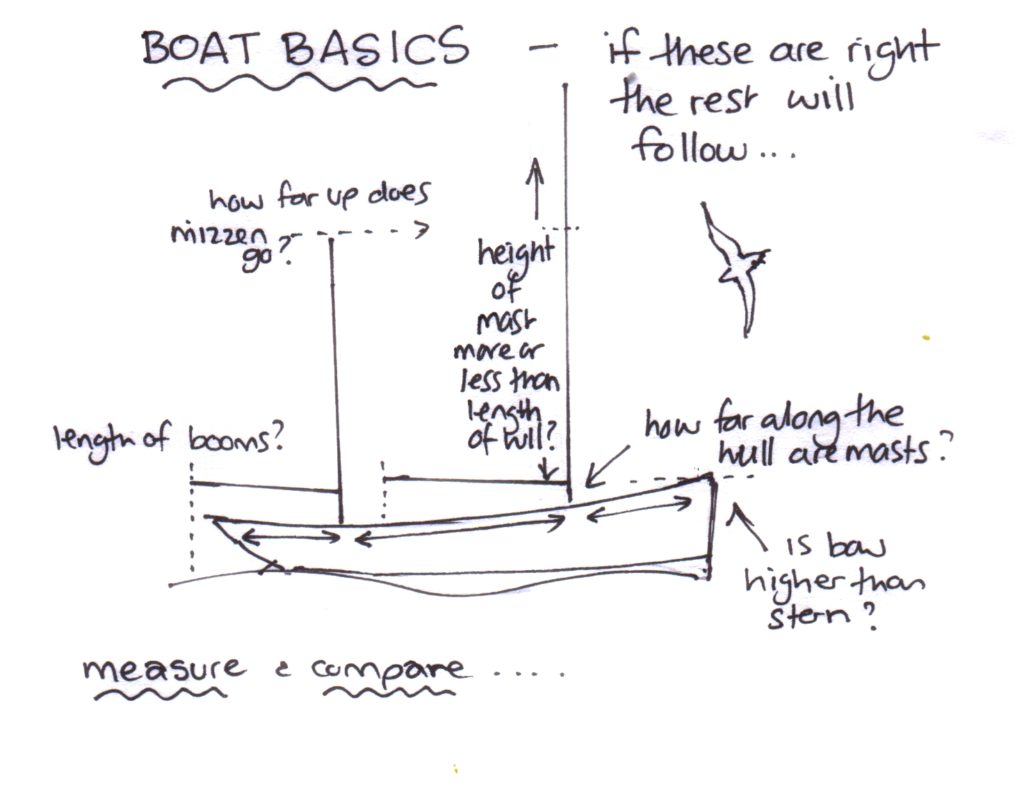
TIP THREE – Measure and compare
Drawing is all about relationships and how shapes relate to each other. Compare the height of mast to length of hull. Where on the hull is the mast stepped? Two thirds of the way from the stern? Measure. Shut one eye, hold out your pencil at arm’s length and use it help you compare – if the length of the boat is half the length of your pencil, how high is the mast? How many times does the height of the stem fit into the length of the hull?
Get this right and the rest will follow. No amount of shading or detail can cover up the wrong shape.
TIP FOUR – Don’t keep rubbing out
Start a pencil drawing with a light touch, using clear but very gentle lines. If you draw a line in the wrong place, leave it, and go again, gradually making the lines firmer as you gain confidence in your shapes. If you rub out, you won’t remember where the wrong lines were and you’ll keep repeating the same mistake. The initial hesitant lines won’t show by the time you’ve finished, they will all be part of the image.
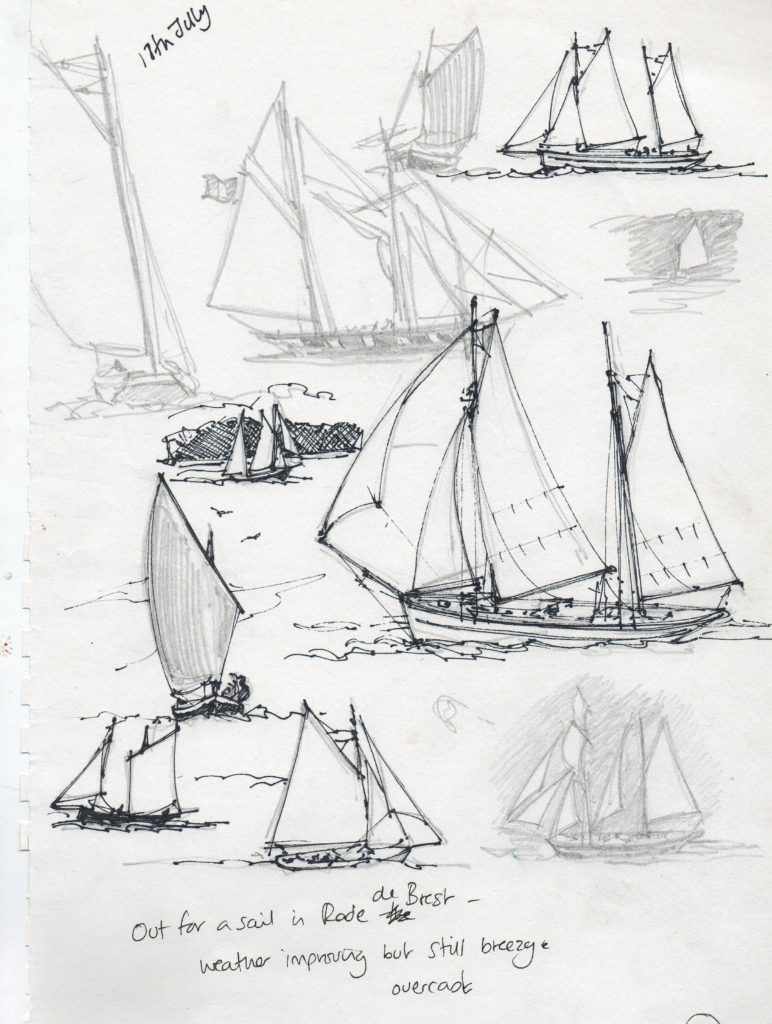
A good way to stop faffing and rubbing out is to do rapid sketches of boats on the move. Try using a sketching pen, which won’t let you do a timid line. There’s no time to correct, you just have to keep your eye on the ever changing shapes and let your hand respond with a series of lines that echo the curves. It will be a mess – good! It will at least have some of the feeling of the occasion.
TIP FIVE – Use the spaces inbetween
Our everyday perception notices objects, not the spaces inbetween, but the artist’s eye ‘reads’ all shapes in a scene, not just the ones that our brain decides are important. The negative spaces (the empty shapes between solid objects) help interpret what you see and define meaning, in the same way as the spaces between the words in this sentence help you to read it.
In a drawing or painting, all shapes are equally important. If the negative shapes are correct, the rest will follow – use all the visual clues you can to make your painting ‘readable’.
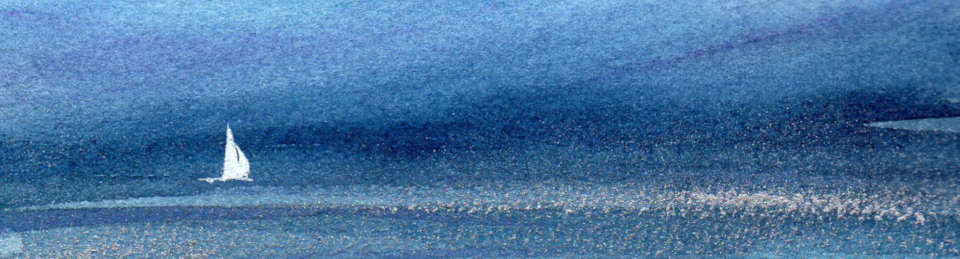
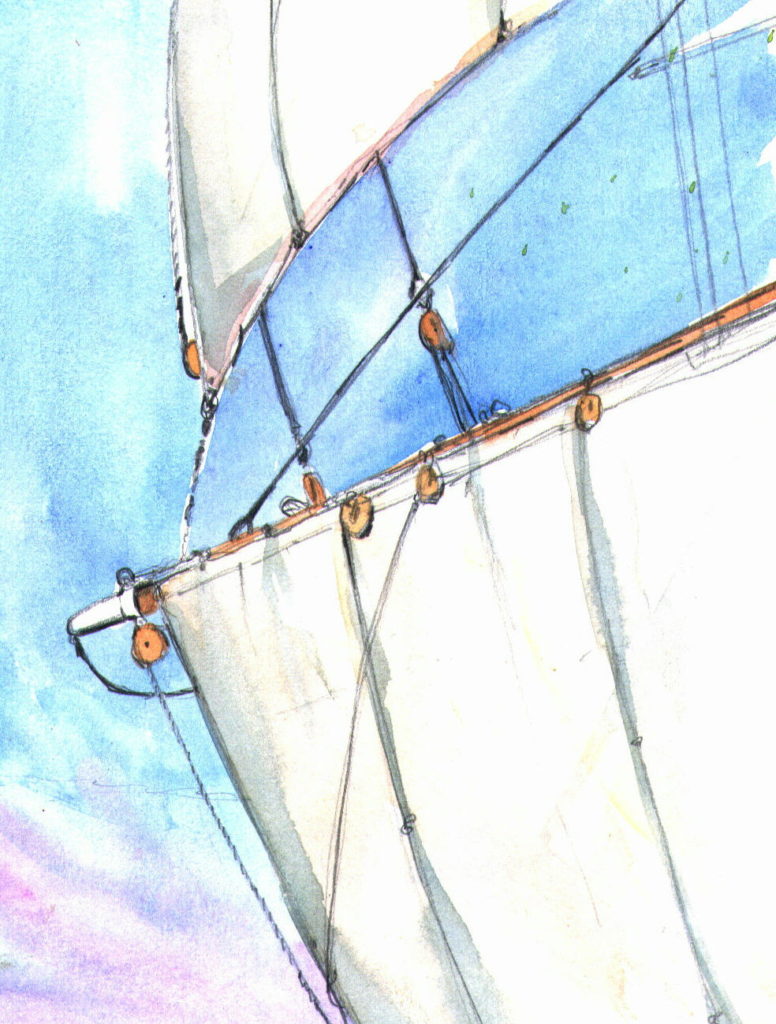
This was done on the foredeck of a sail training ship – the shapes of the blue sky are a stronger element of the composition than the white sails.
TIP SIX – Cheat!
A book written in 1944 by Michal Leszczynski entitled ‘How to Draw Sail and Sea’, has stern words on the subject of drawing from photos:
If you are not old enough to Sign the Articles and join a real ship, your drawings should be of imaginary vessels. Call to mind any ship and give her all sorts of commissions, and draw her in various adventures of her imaginary career. But you should never use photographs or pictures by other artists as a basis for your own sketches.
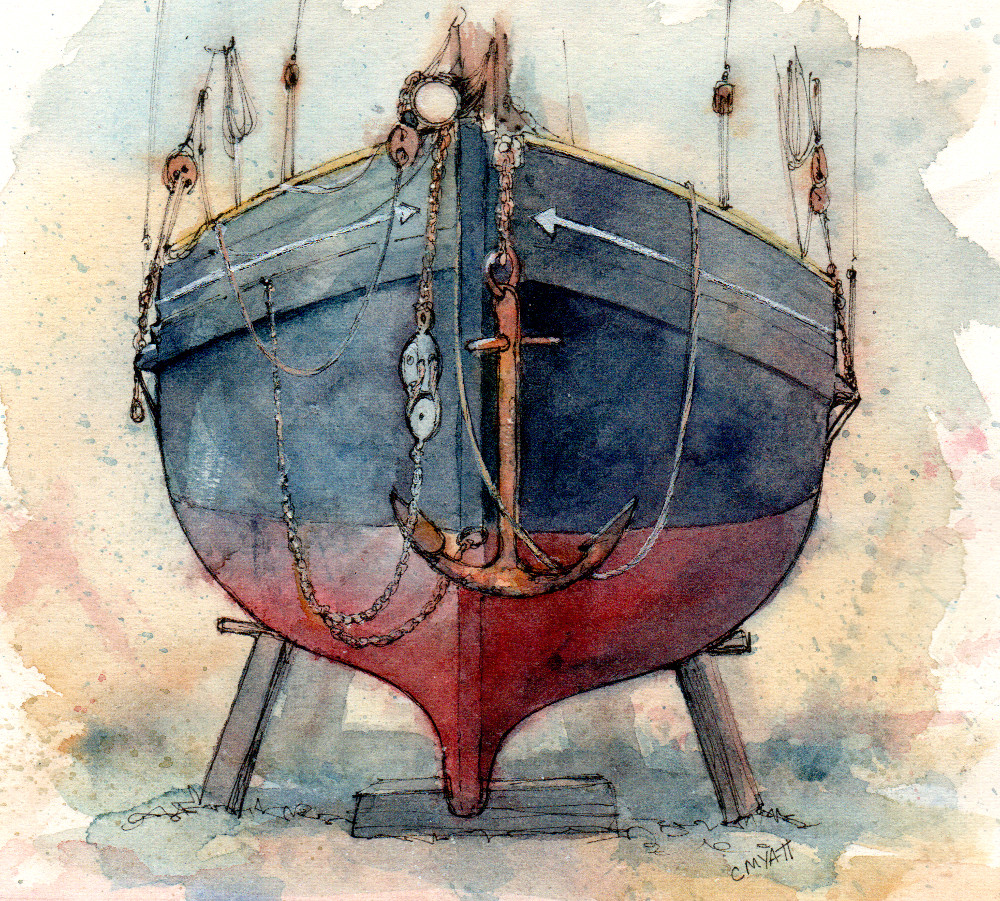
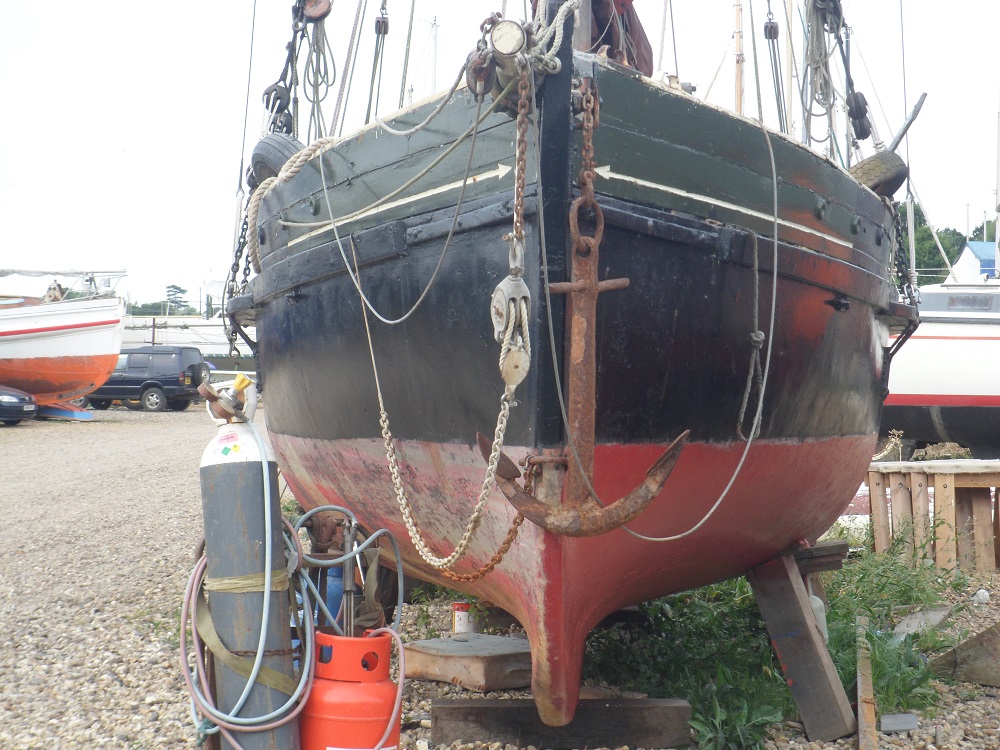
You’ll be relieved to know that I don’t agree with that. Yes, it’s ok to work from photos. Best of all, work from sketches and use your photos to remind you of detail and check accuracy (if you copy from other people’s photographs, ask their permission). Don’t be a slave to what’s in the photo, use the information and crop the image or change things around. Trace if you need to trace, but sketch as well, or you’ll never be free to develop your skills and the paintings will end up lifeless; photos often distort perspective and they also flatten colour.
TIP SEVEN – Perspective perils (1)
‘I always get the perspective wrong!’ is the most common cry from my students. It’s a complex subject and has much to do about how the brain interprets what you see and lets you know, for example, that you are seeing a large boat far away rather than a small boat close up. So I’ve summarised the two basic perspective principles that your brain uses subconsciously to make sense of what your eyes take in. You know them, but you may not know that you know them… and to draw what you see they need to be at the front of your mind:
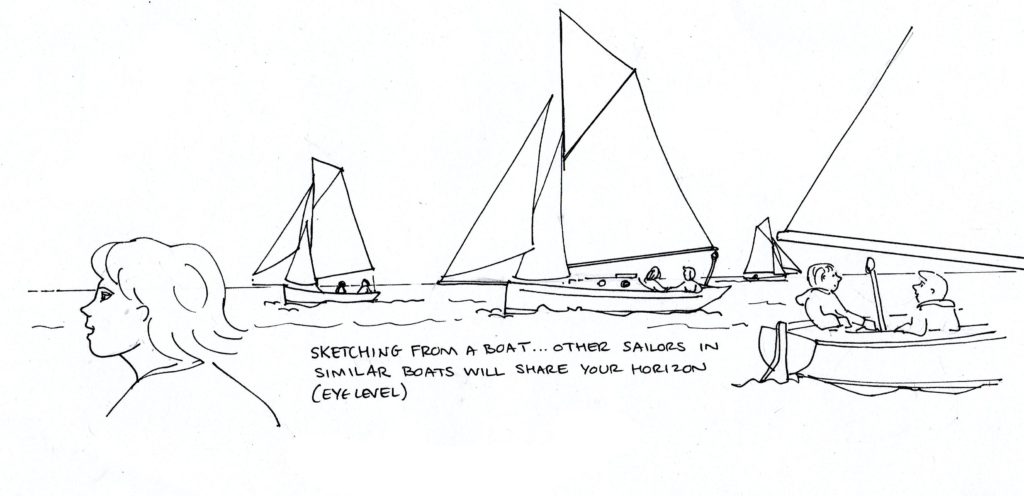
THE HORIZON IS ALWAYS AT YOUR EYE LEVEL
Other people at the same height above sea level as you, the artist, will share your eye level. When drawing from a quayside or clifftop you have a different eye level to the sailors in your picture, but when drawing from the deck of a boat remember that crew on other boats will have their eye level on the same horizon as you – more or less, taking into account different sized boats and different sized people. Sounds confusing, but next time you’re out on the water, have a look. It’s not something we normally think about.
Use this fact to help you place boats correctly in the scene. Whether near or far, those eyes will all be on the same horizon (yes, it does make the size difference between near and far boats greater than you think… I’m coming to that).
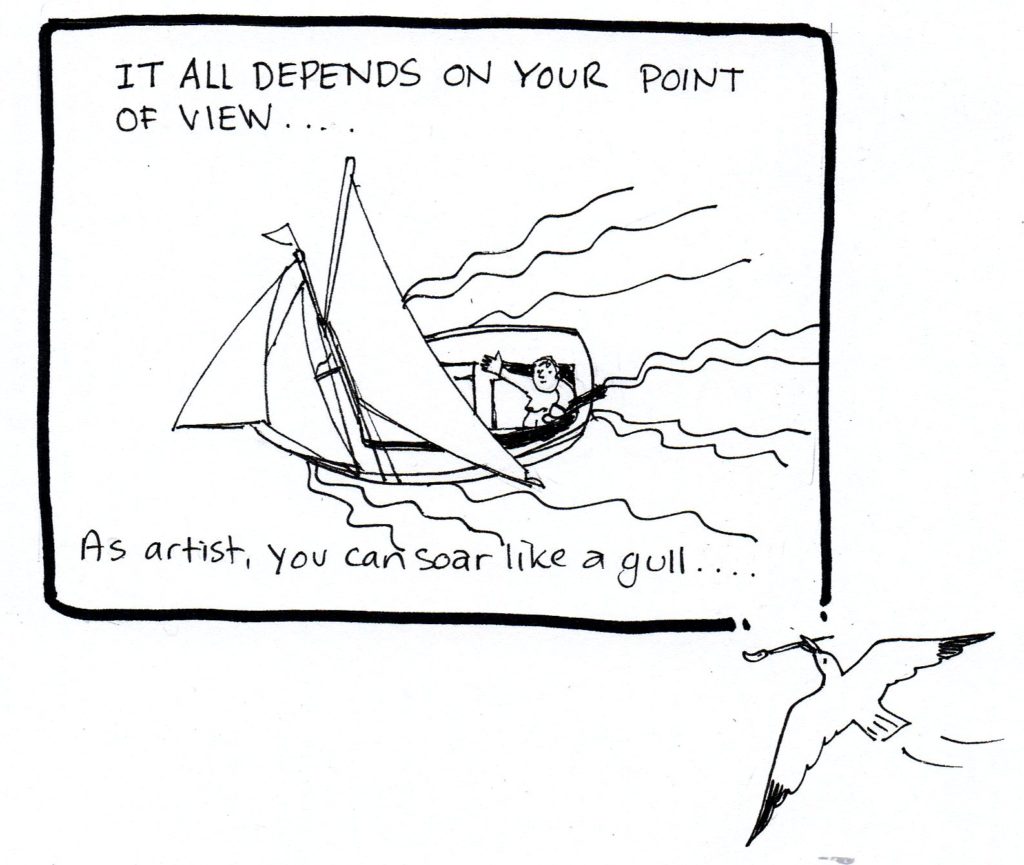
You can of course choose to take a different viewpoint to the people in your picture. You can use your imagination and try a seagull’s eye view, for example, in which case the horizon might not appear on your drawing at all.
TIP EIGHT – Perspective perils (2)
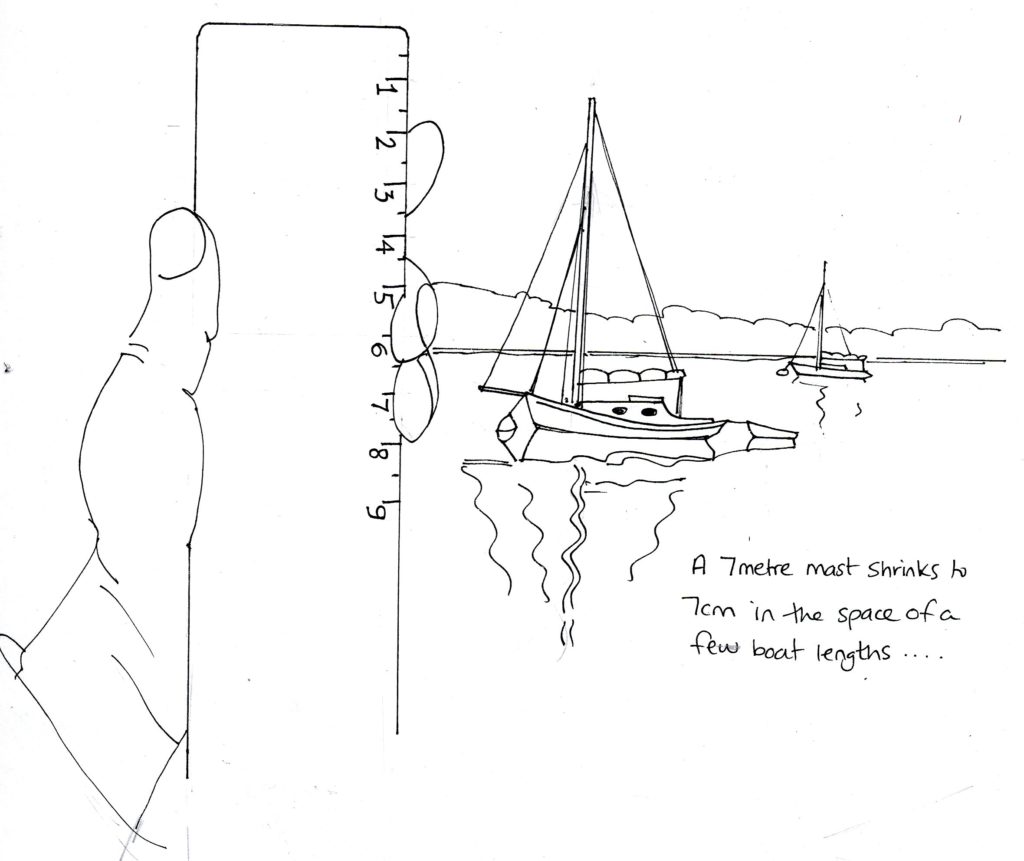
THINGS GET SMALLER THE FURTHER AWAY FROM YOU THEY ARE
Yes, of course you know this, but do you realise how much smaller they get, and how quickly? If you are on board now, try and guess whether the mast on the boat moored a short distance away will be longer or shorter than your index finger…. now measure it and you will be surprised. This one was on the next row of moorings to me – and a mast about 7m high has shrunk to less than 7cm.
When looking at distant boats sailing, they may appear to be only be a few millimetres tall but our brains will ‘zoom in’ on the scene like a camera.
As an artist you can do this too, but it helps to be aware of scale if you are drawing a view which includes both close up and far distant elements.
TIP NINE – Study other artists
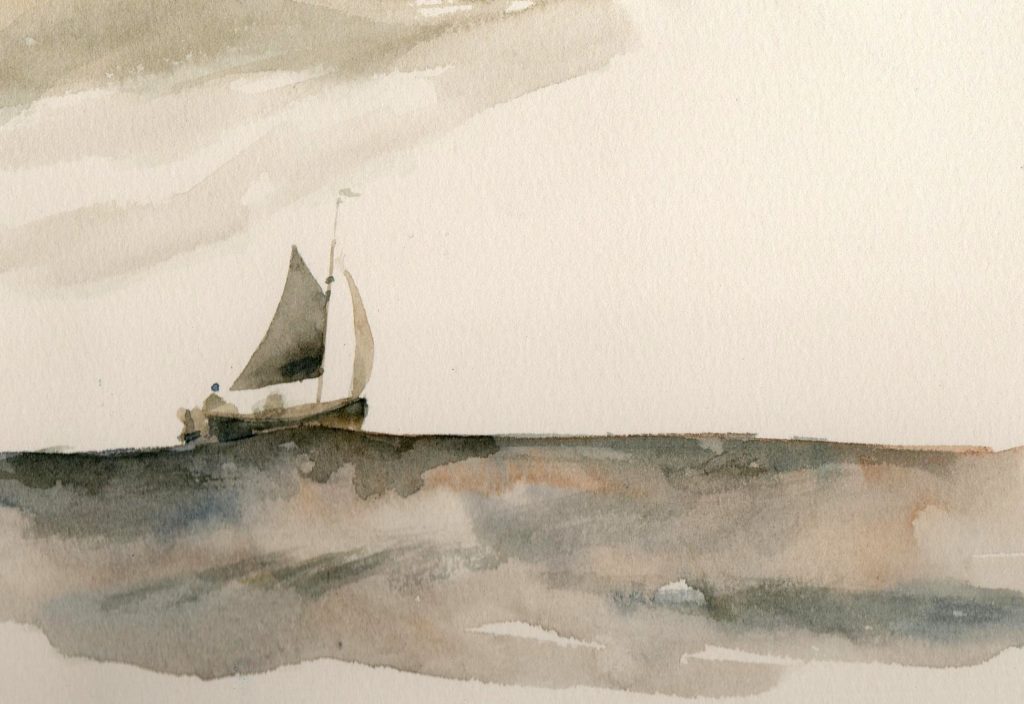
Look at the work of as many marine artists as possible… preferably sketches as well as ‘finished’ paintings. Monet did pages and pages of simple sketches of boats at sea, and Turner tried to capture the essence of a boat in a few brushstrokes.
Have a go yourself – this is my attempt at copying one of Turner’s sea sketches.
TIP TEN – Ignore all the rules and use your imagination
Before the invention of the camera, the job of an artist was to record as accurately as possible – but now you are free to do as you please. Yes, it’s satisfying to draw accurately and it lays a good foundation as the essence of an object is in its shape. But that aside, there are no rules. Change things, ignore perspective, be a child again. Play around with the shapes and patterns of overlapping sails, zoom in on details, notice things you may not have noticed before.
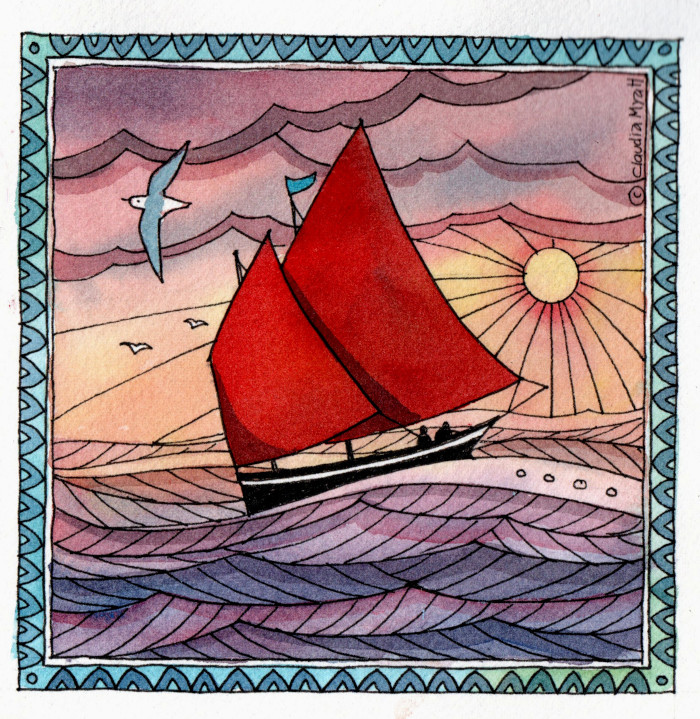
Play around with shapes, let yourself doodle whatever inspires you.
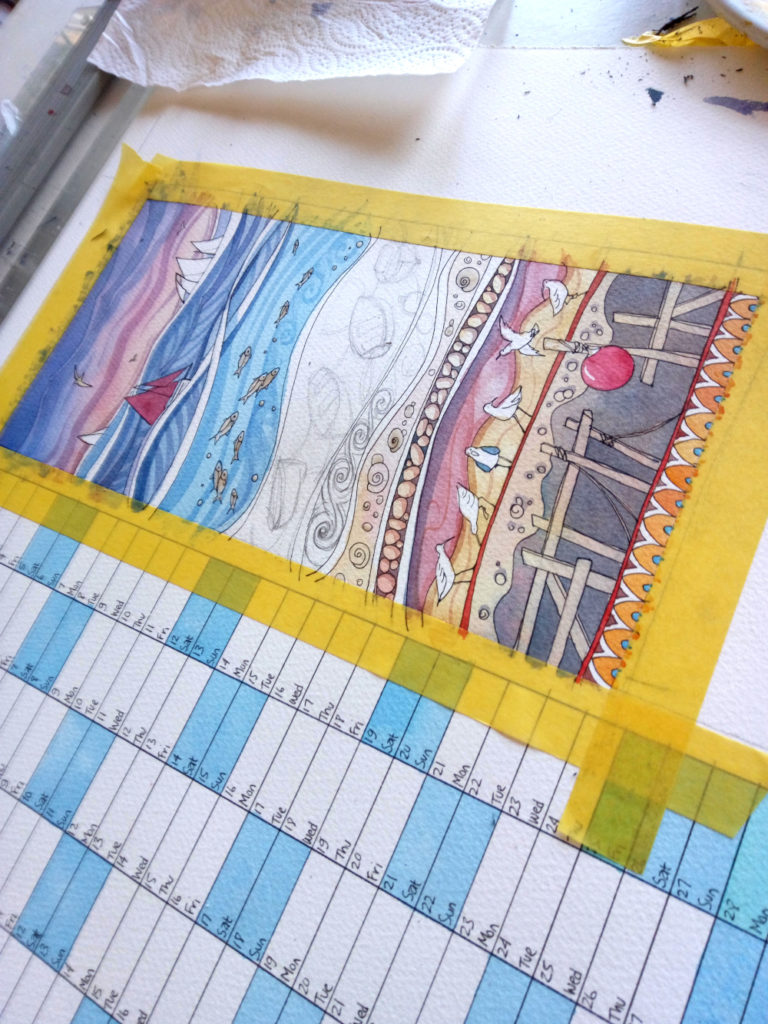
This doodle has been developed over time and is now going to be the image on next year’s wall planner (just so you know I’m on the case!)
So that’s it, sorry it’s a long one. Finally, I’d just say draw like you mean it, draw for pure enjoyment and don’t be discouraged when your results are not as good as you’d like them – the more you do, the better you’ll get.
Thanks to Jo and Luke Powell and Working Sail (www.workingsail.co.uk) and Classic Sailing (www.classic-sailing.co.uk) for deciding that sailing/sketching holidays are a good idea! Come and join me on land or on sea next year.
I so enjoyed our sail and sketch holiday, in spite of initial disappointment about not going to Scilly. Drawing added an extra dimension to my annual sailing trip, and, Claudia, your tuition and encouragement gave even the most ham-fisted of us the inspiration we needed to produce work we were eventually proud of! Drawing ‘on the go’ in rather lumpy seas, was not for me but I enjoyed having the time when ashore, tucked into little corners of harbours like Cawsand,, to heed your advice and have a go. Thank you!
Thanks Chris, much appreciated. We made the best o the weather, didn’t we! Keep on sketching and I hope we meet again.